Homelab
CurrentMy homelab setup, updates and specs.
Hardware
Software
Homelab
Introduction
When you start getting into computing you might come across a group of people fascinated by large scale computers and the capabilities they offer. Homelabbing is a hobby that tries to imitate that, managing a datacenter but to scale.
The core aspect of homelabbing is setting up one or more machines as servers that provide services on your network or even through the internet. Said services can do anything, from mundane tasks like managing DHCP or DNS requests to hosting complex web apps. What you host is up to you and the only limitation is imposed by the hardware itself. In the process of setting everything up there are some other elements to take into consideration such as networking, hardware, power delivery, operating system management, deployment and configuration of the services and so on, it has a bit of everything and figuring it all out is part of the fun.
Aside from hosting something meaningful, which is the main objective, you might have additional constraints like keeping the cost as low as possible, keeping the power budget as low as possible, reusing old hardware, using low noise hardware, having hardware decoding for video playback, having IoT or home automation capabilities, having redundancy, having automated backups...
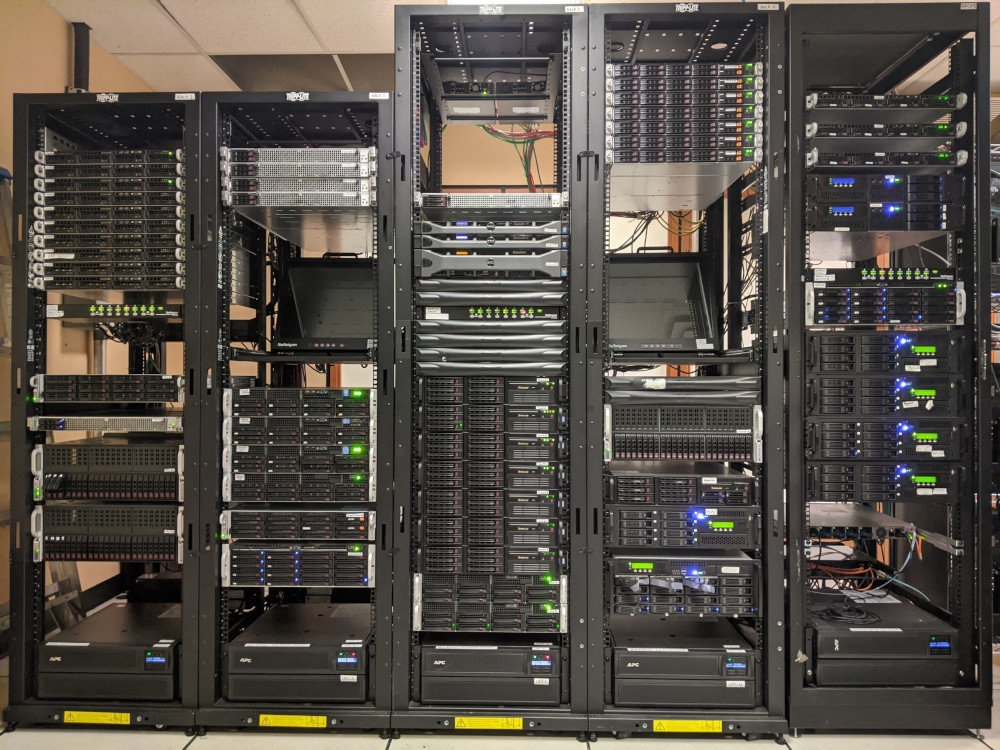
There is also lots of combinations of hardware, software, layouts and network topologies. No homelab is identical and it is fun to see how people take compromises to achieve their objective with some of the above constraints.
Goals
The main goal of my homelab is to host various lightweight web apps and some miscellaneous services:
- Pihole: A DNS filter that block advertising and malicious domains.
- Jellyfin: A streaming service that allows for local video playback. Great for films and shows.
- Nginx: A web server.
- Qbittorrent: A web based torrent interface for file downloading.
- Grafana + Prometheus + Cadvisor: A dashboard, data scraper and metrics platform for monitoring performance and logs.
- Game servers: Perhaps some game servers in the future.
There is heaps of services that can be hosted on simple hardware. If you are getting into homelabbing you might want to consider checking out Awesome Selfhosted, a huge list of useful hosteable services.
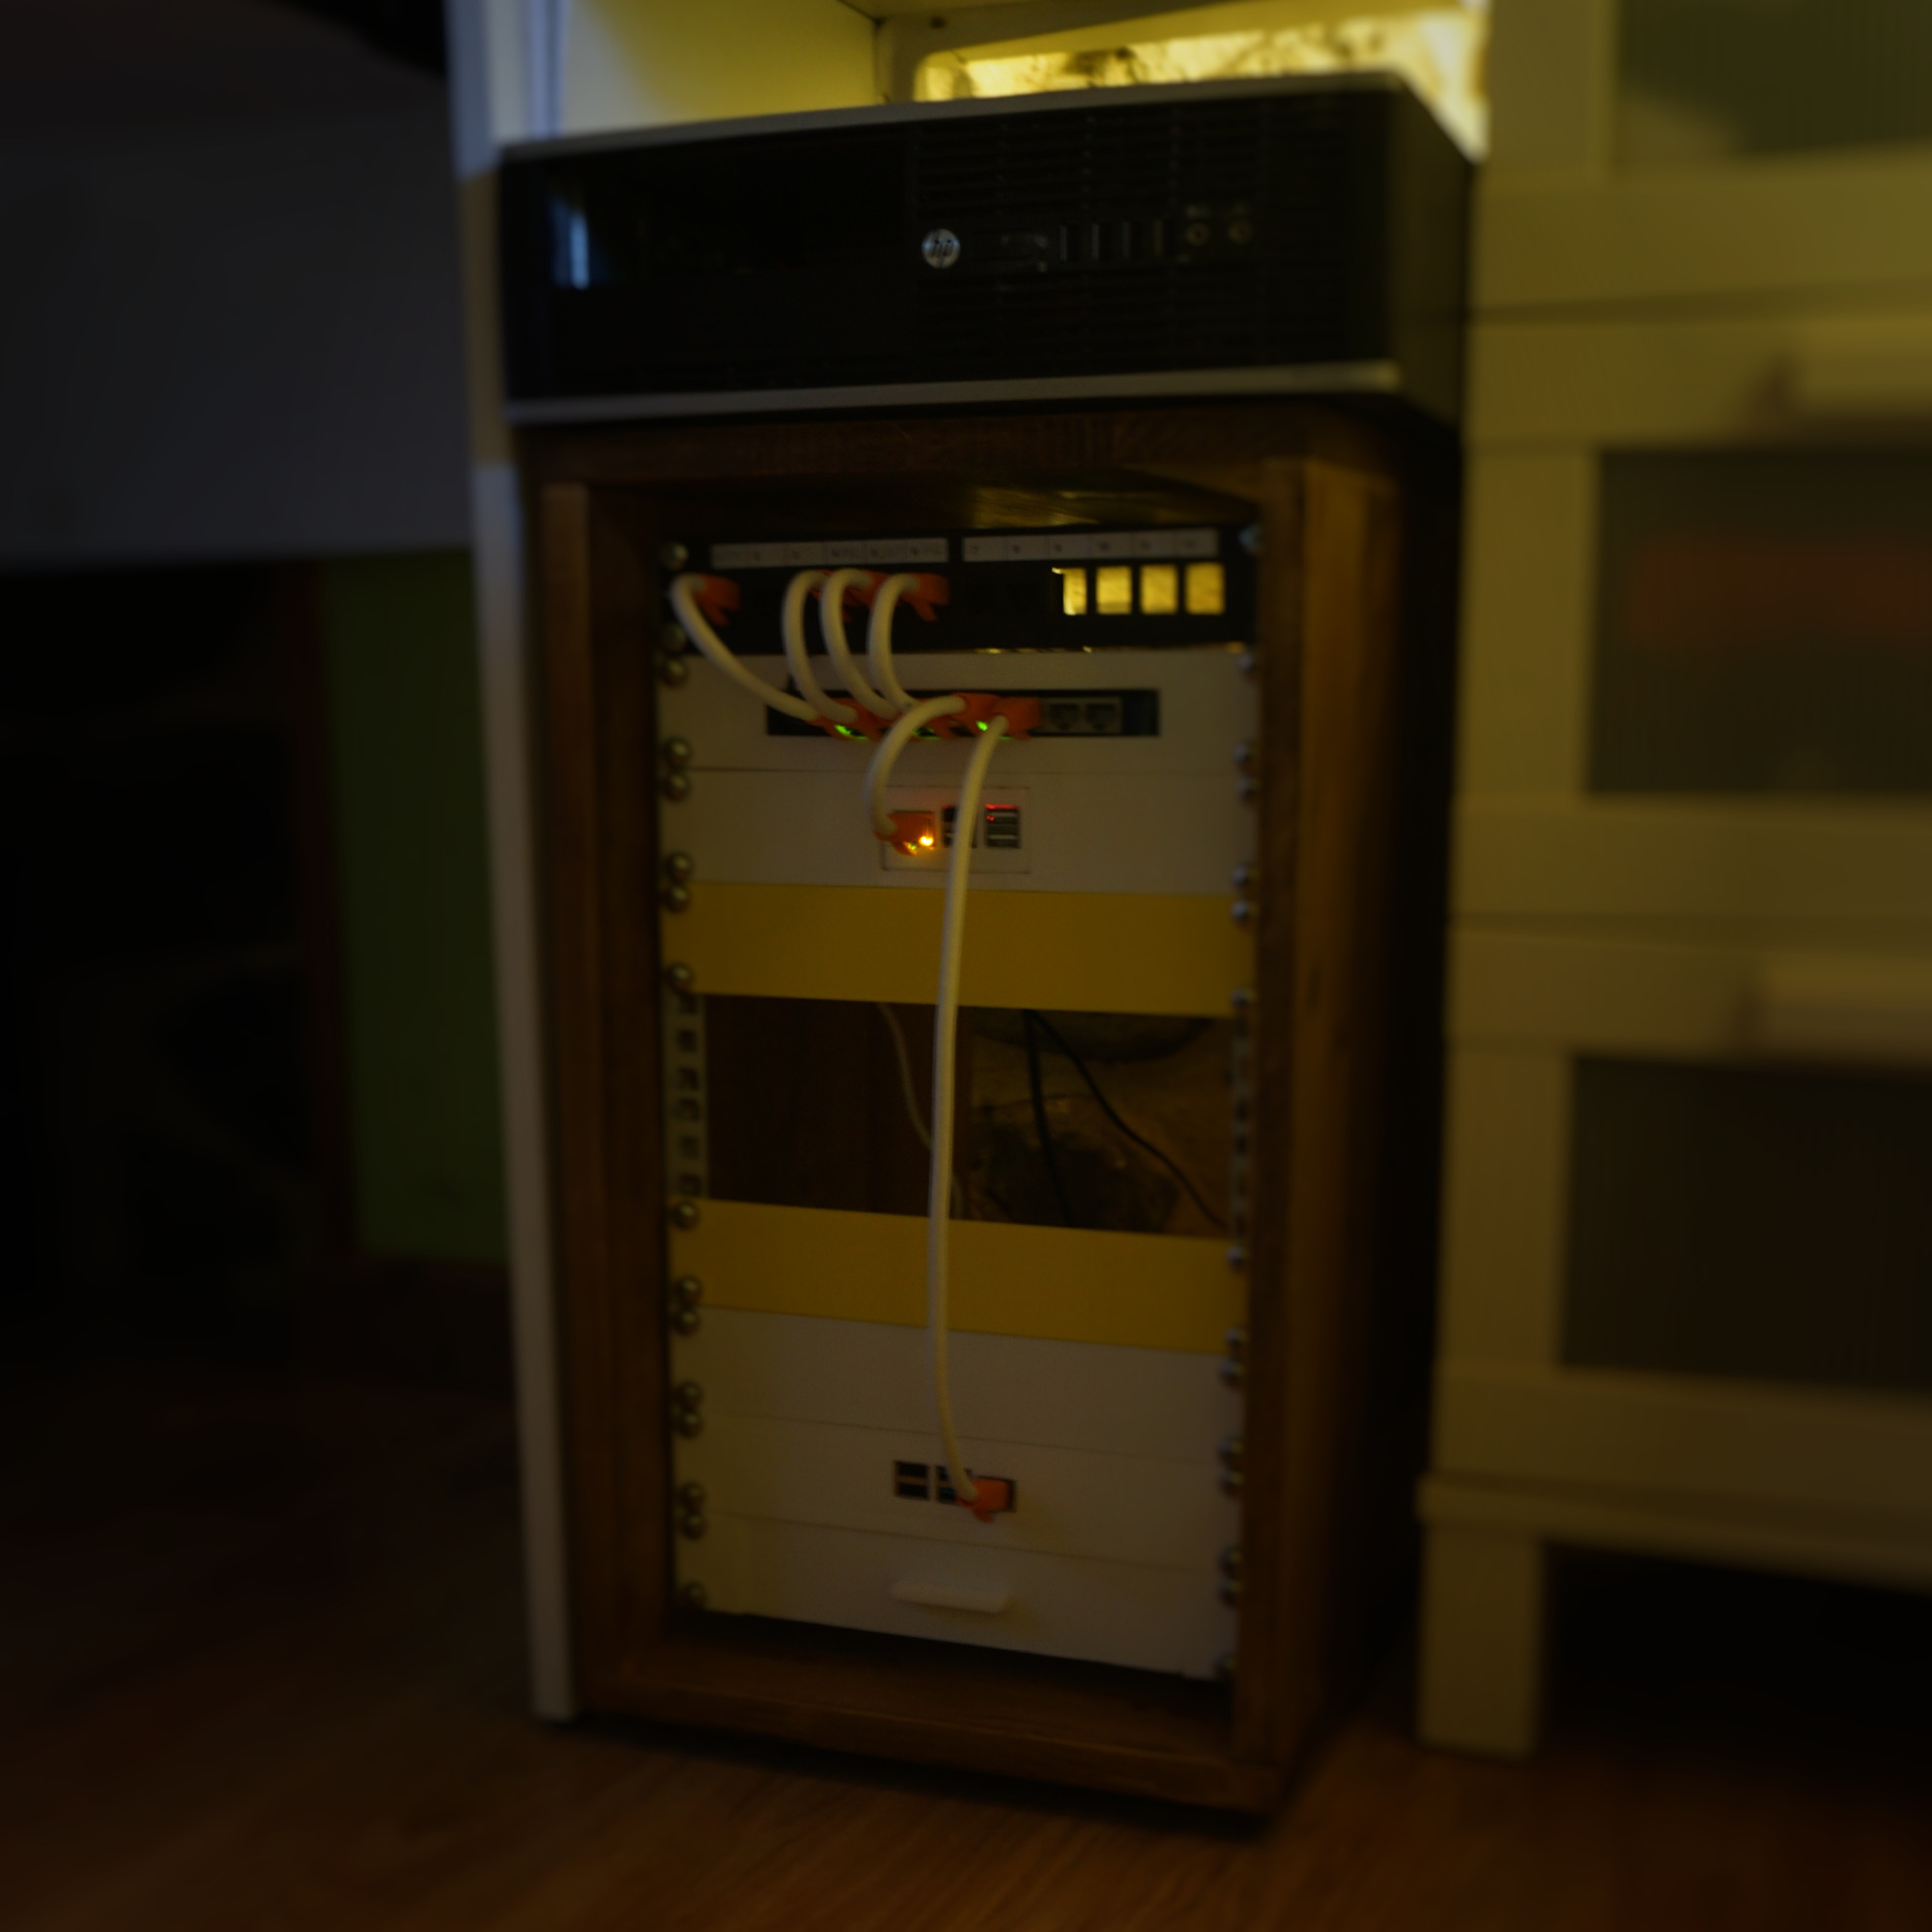
As for the constraints, it has to be as power efficient as possible, as quiet as possible and have hardware decoding on at least one of the machines. The rack will be located in my bedroom, so it has to look tidy and blend in with the rest of the furniture, and of course, all the components must fit on a 10" rack.
Hardware
Once you know the services you want to host, picking hardware is the next part of the process. It is important to choose hardware according to your constraints, because once you have a certain piece of hardware, it is not as easy to modify as software is.
Since power efficiency, space and noise are of prime importance in this build, I am going to strictly use single board computers (SBCs). A SBC is a card-sized computer that features a reasonably powerful and highly efficient CPU, in my case using the ARM architecture, sort of like a mobile phone. The average SBC has a power draw of 2-10W, with CPUs dissipating roughly 5-7W under extreme load. In comparison, your average desktop x86 CPU has a TDP of 65W, up to 10 times more. This will allow me to have compact, very low power machines that can have passive dissipation most of the time.
SBCs are not without their flaws. They have limited expandability as opposed to servers or desktop computers, with no PCI-Express, RAM slots, SATA ports or the like to be found. They also have limited OS and app support, as the SoCs they use have specific drivers that are not usually shipped or compiled into mainstream kernels, plus they are frequently based on the ARM architecture. SBCs can run Linux and most applications as long as they are compiled for the CPU's architecture, but you are frequently stuck with the Linux images and support the vendor provides.
To mount everything to the rack, I have designed 3D-printable plates and cases for each one of the computers and network appliances.
With all of that said, these are the machines that I currently have in production:
Orange Pi 5 Pro 8GB
The workhorse, it runs most internal services, including Jellyfin.
I chose this SBC to act as a main server because it has a Rockchip RK3588 SoC that supports hardware decoding and is tremendously powerful. I was tempted to get the 16GB model, but since I was not planning on running everything on it, it seemed a bit overkill.
Unlike on the other machines, I did not go the full passive cooling route with this one as it was going to be running quite a few containers and sometimes transcoding video in the background, which is quite resource intensive (Specially if the codec is not supported and the CPU has to do all the work). To achieve effective cooling with as little noise as possible I bought a Noctua PWM fan, hooked it up via GPIO to the Orange Pi and ran a PWM script to ramp up the fan when things get toasty. With the heatsink alone and average loads, the CPU is kept cool enough so that the fan never kicks in.

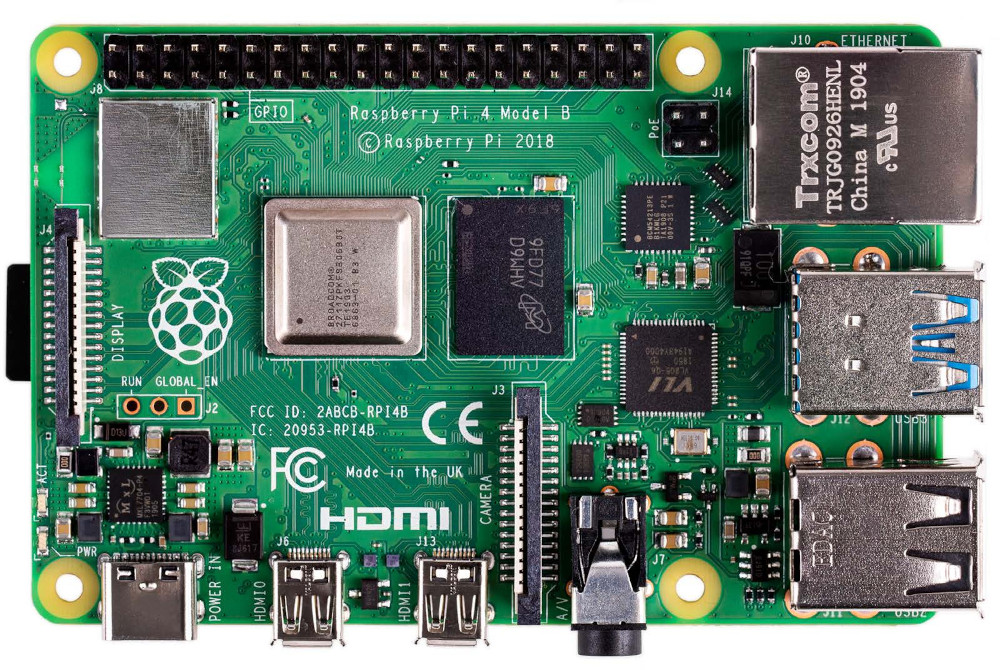
Raspberry Pi 4 4GB
A robust and balanced SBC with great software support by the Raspberry Pi Foundation.
It is not the mightiest machine out there, but it will primarily be used to run a couple of light services like Nginx and some internet facing services. Since it will be exposed to the internet, it is more important to have proper software support and updates than being fast, so a Raspberry Pi was bound to fill this gap as no other vendor provides such support.
This machine is equipped with a Broadcom BCM2711 with 4 Cortex-A72 cores and 4 GB of LPDDR4 RAM. The use case of this machine allows for a passive thermal cooling solution; it will not require a fan for it's intended load.
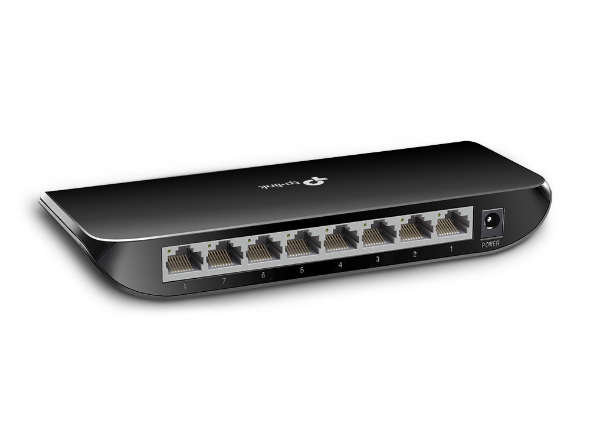
TPLink TL-SG1008D
A switch is a piece of hardware that allows to connect multiple devices to the same network. Switches usually come in different shapes, sizes, number of ports and speeds. In my case, the homelab will be using a simple off-the-shelf TPLink TL-SG1008D gigabit switch with 8 ports. The whole network is designed to support gigabit speeds, so this switch, as simple as it is, is capable enough for this use case.
Software
In order to host some services you need an execution environment; that is an Operating System and a set of libraries that support the services. My operating system of choice for servers is Debian because of how robust and stable it is. I dislike Ubuntu and Ubuntu Server because it is not as minimal and Canonical, the corporation behind it, makes some questionable decisions from time to time that make them more annoying to manage than other distributions. Since I will be using SBCs, stock Debian might not be available, so I will stick to whatever is the closest to it.
On a classic server setup all services are running on top of the operating system simultaneously. This is efficient resource wise, but has security and reliability implications; if one service gets compromised, it is much easier to access to the entire server since the service is running with no isolation. Also, if an update breaks a library, multiple services could be affected.
When computing power got cheaper, system administrators started virtualizing their servers, running the operating system in a virtual machine (VM) inside of the server. The server would have multiple VMs with services running inside of them. This approach mitigates the previous problems by making each service run in its own isolated environment. If one service or VM misbehaves, the others will not be affected. However, this imposes another limitation: for large scale operations (Or operations that are power constrained or resource limited) it is a suboptimal approach, as a lot of resources are wasted per VM. Virtualization adds overhead and a full standalone operating system is running alongside each service. When you get 20 or 30 VMs running in a server, with 20 or 30 instances of Debian, things get slow and RAM gets clogged.
Docker offers the best of both worlds and is used alongside other bleeding edge technology in large scale datacenters. On Docker you can run services on "containers" which are standalone bundles that contain a minimal Linux image, libraries and the service that you want to run. It does not use traditional virtualization and has its own custom engine to run the containers, so it is much more resource efficient than using VMs.
Another great selling point of Docker is that it makes service deployment much easier; it has simple commands to download, manage and launch services. Traditionally you would download the service from your distribution's repositories and configure it manually by editing some non standard .conf file. This is hugely time consuming and often requires extensive manual reading to get all the config right. With docker, you can download images from huge repositories, like hub.docker.com, that are preconfigured and almost ready to run. You only tweak the essentials and you are all set.
At a slightly larger scale, it is common to have multiple containers running on the same machine. On a regular Docker setup, to launch a container a long command has to be run manually in the shell or in a script. This does not scale well considering a regular machine can handle up to tens containers and some services may have lots of dependencies. Docker Compose is a separate tool that allows to define a list of containers, configs, network settings and dependencies inside of a YAML file and manage all container in a much more organized and centralized way. This is a simple example of what is known as Infrastructure as Code and will make container management much easier, as Compose integrates interaction with both single and multiple containers.
As a rule of thumb, all machines in my homelab will be running some sort of Linux based (Preferably Debian-like) OS, with Docker and Compose to manage containers and some custom scripts mixed with Cron for housekeeping tasks.
Networking
Networking, from my point of view, is one of the most fun parts of homelabbing because it mixes hardware and software, and it takes some thought and skill to get neat and tidy. It can also be extremely expensive or extremely cheap depending on what you want to run.
On a serious production network ideally you would have a powerful router, a firewall and several switches to distribute all the traffic evenly with redundant components and links. This is of course prohibitively expensive and overkill for a homelab setup, so in order to make it more affordable I will stick to 1 Gbps speeds, use regular UTP cable instead of fibre and reuse hardware whenever possible.
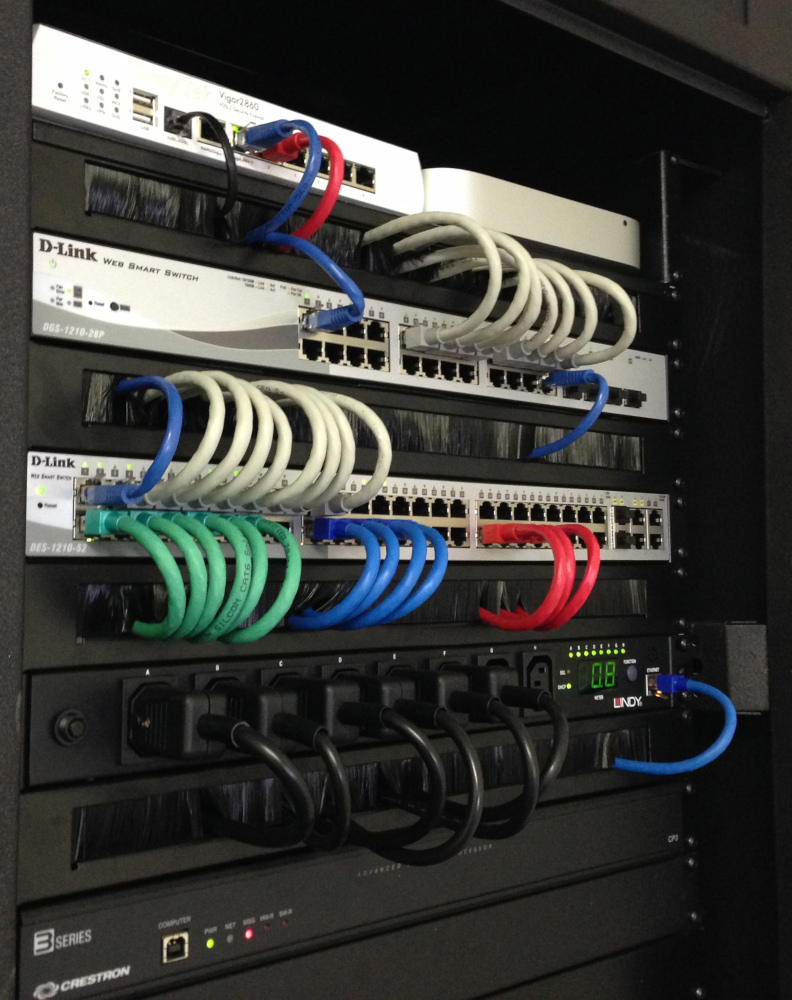
Despite the cost cutting, I would like to preserve the big network look with all the patch cords and such, so I will be using the patch panel and switch arrangement. On an actual 19" networking rack, when giving service to a network, the UTP cables are not run to the switch directly, instead, they are punched to a rack appliance called a "patch panel" that has cable holes in one end and a female RJ45 jack on the other which is connected to the switches via a small patch cord. This allows for better cable management, organization and easier troubleshooting on large networks. On my toy network it is mostly going to serve an aesthetical purpose.
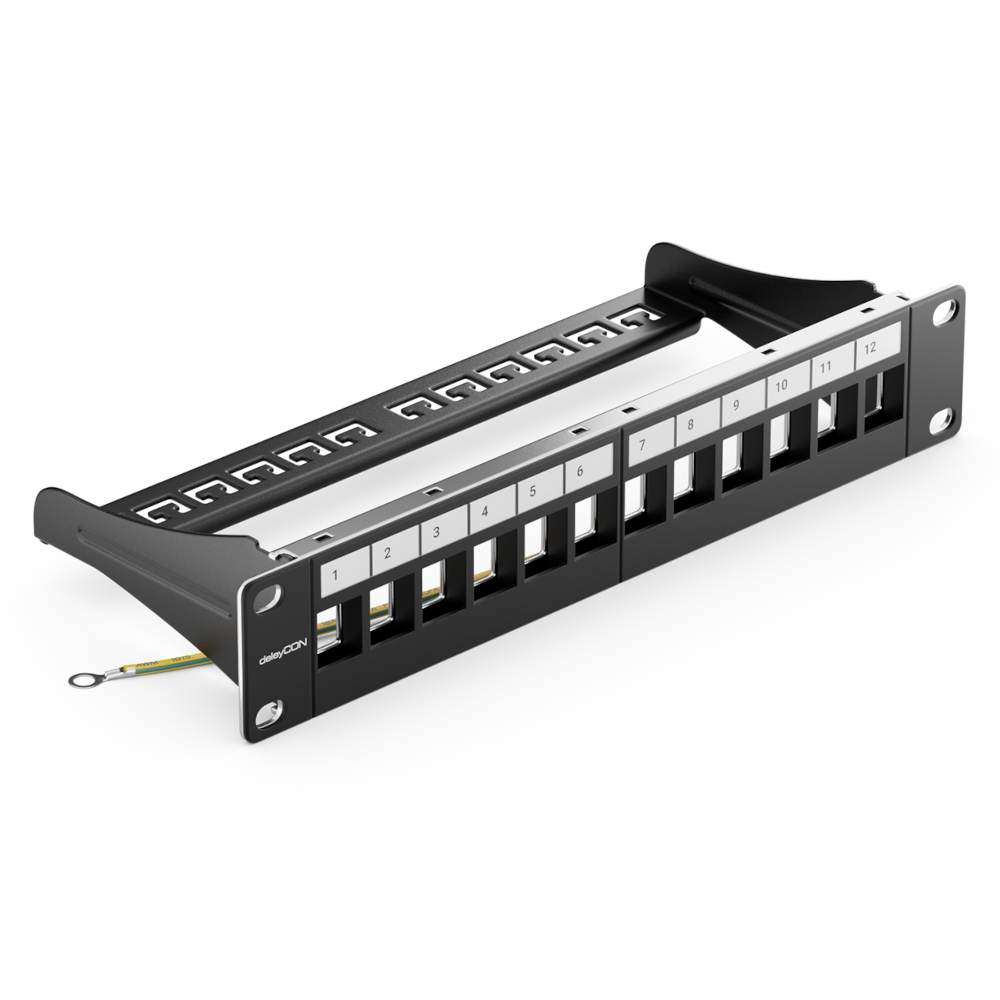
Instead of a classic patch panel where the UTP pairs have to get punched, I will be using a keystone variant where all holes of the patch panel can be filled with standard keystone jacks. This makes the patch panel more useful, as other types of keystones like HDMI or USB can be hooked to it. This could be useful in the future if for instance I want to have easy access to video from a certain machine.
All the cables are custom and made to length. I have used Cat 6A UTP cable for the entire network.
Power
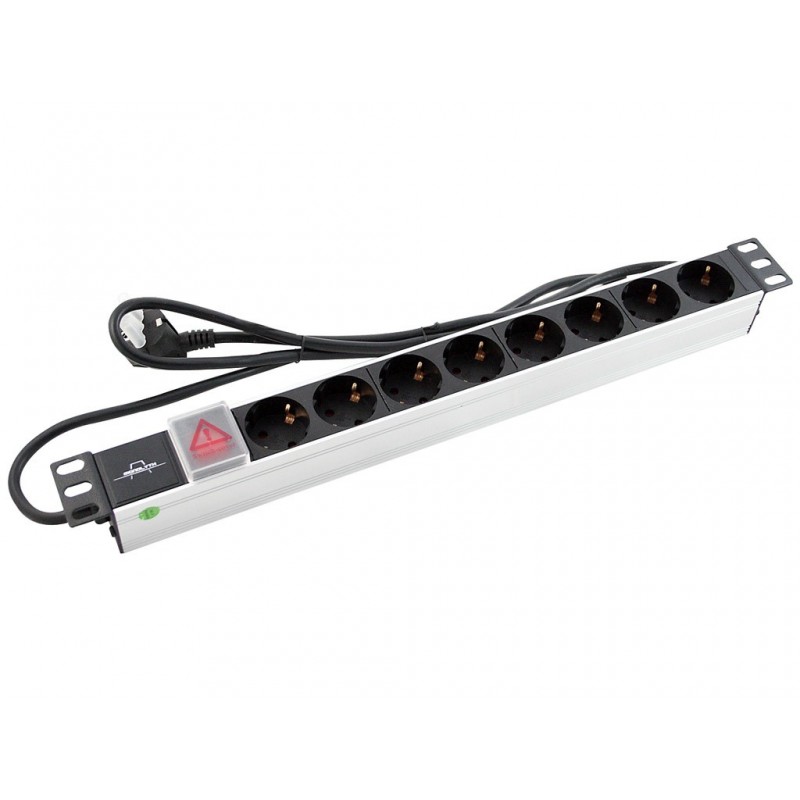
Most rack appliances use standard IEC C13 cables or power supplies that connect to common wall sockets, in my case to european schuko sockets. A Power Distribution Unit or PDU is a glorified name for what essentially is a power strip, sometimes with advanced features like fuses or switches to control individual sockets.
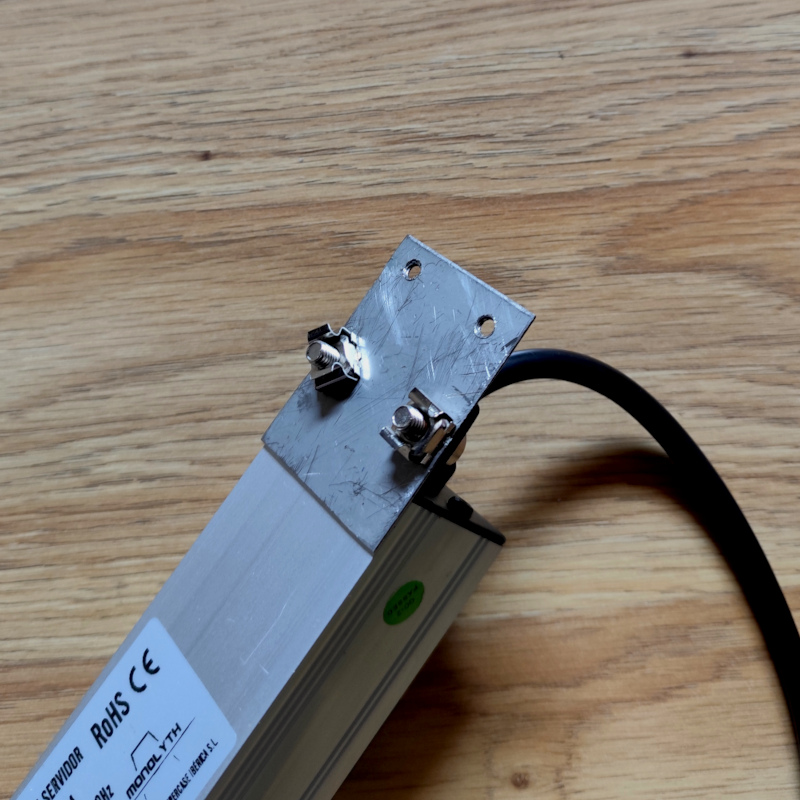
It is probably the most uneventful part of the build. A simple unfused 19" rack mountable Power Distribution Unit by Monolyth is screwed to the back of the rack with wooden screws. It obviously cannot fit horizontally as it is 9" wider than the rack, but it fits well vertically with a custom adapter made out of some scrap metal i had laying around. This PDU is as simple as it gets, sporting just a few european Schuko sockets and an On/Off switch.
I would like to add an UPS in the future but it is not currently a priority. I do not mind some downtime caused by outages as pretty much everything else that will use the services in the rack will also be off.
Conclusion
The rack looks really clean and blends really well with the rest of the bedroom. Managing everything on it is a breeze and the patch cables on the front of the rack make it really easy to troubleshoot any network related issues and plug in new devices without having to deal with messy cables. The network was tested with Iperf3 and it performs as expected. The uptime so far has been flawless, with the only exception being planned shutdowns to modify or move some rack appliances.
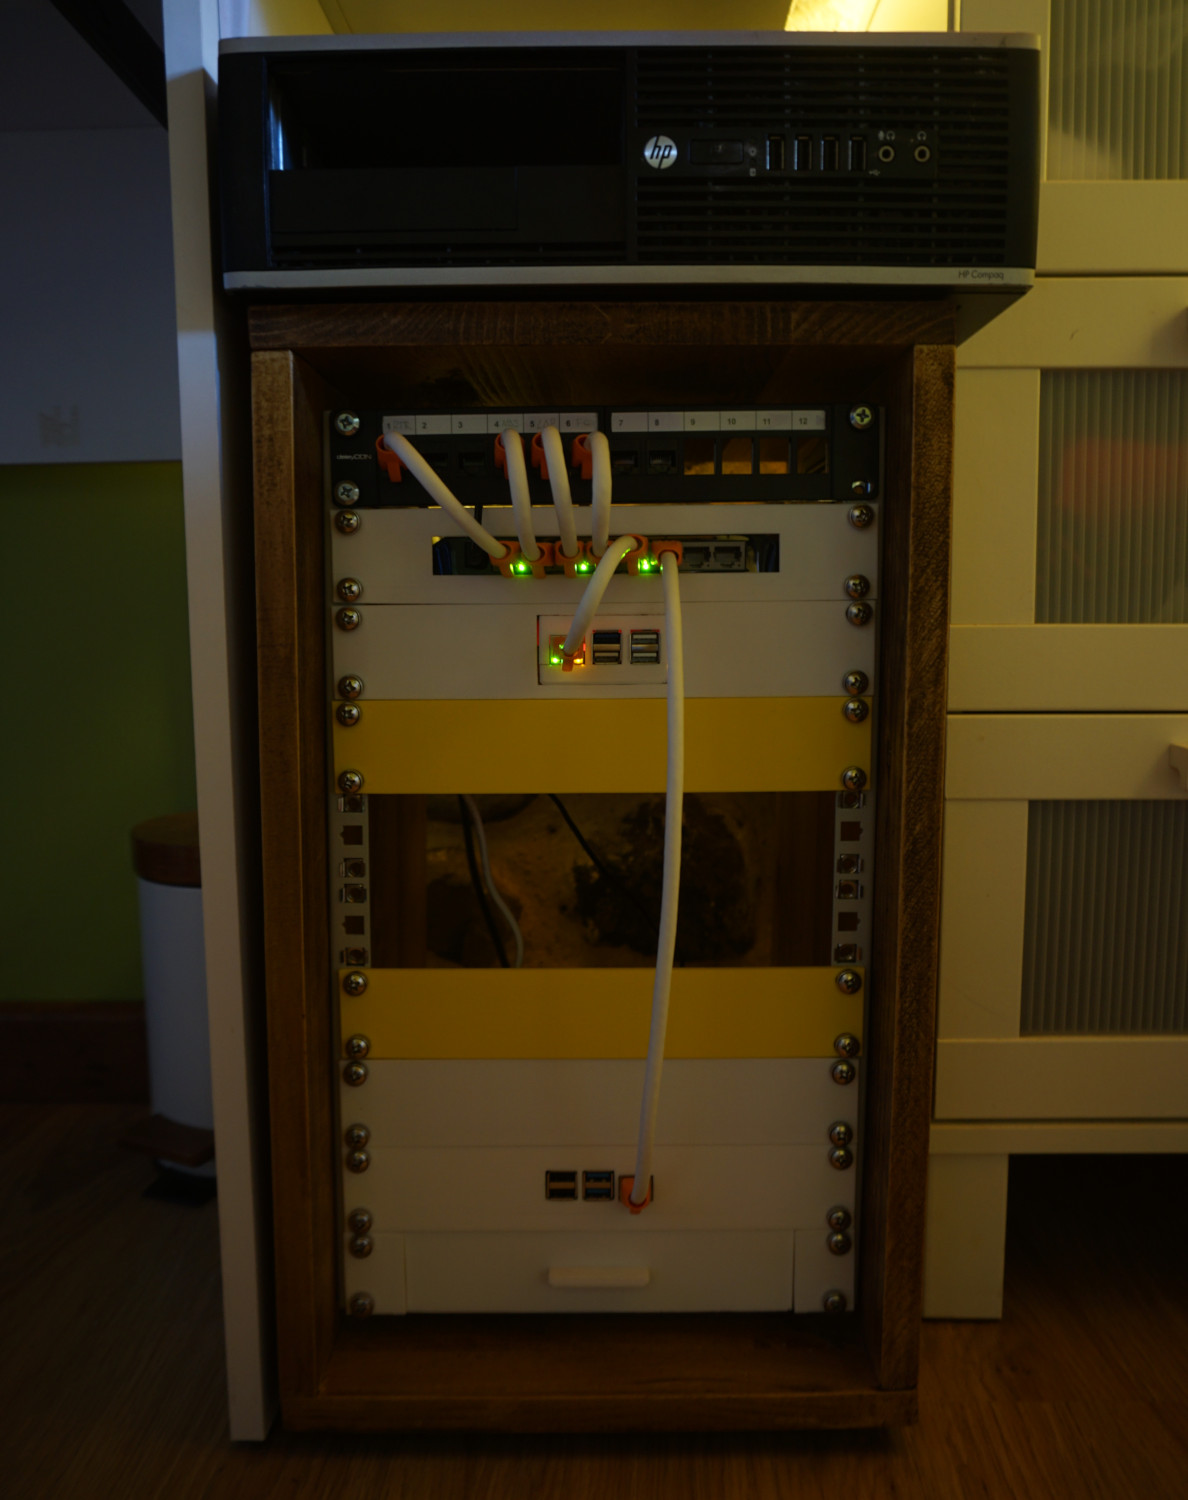
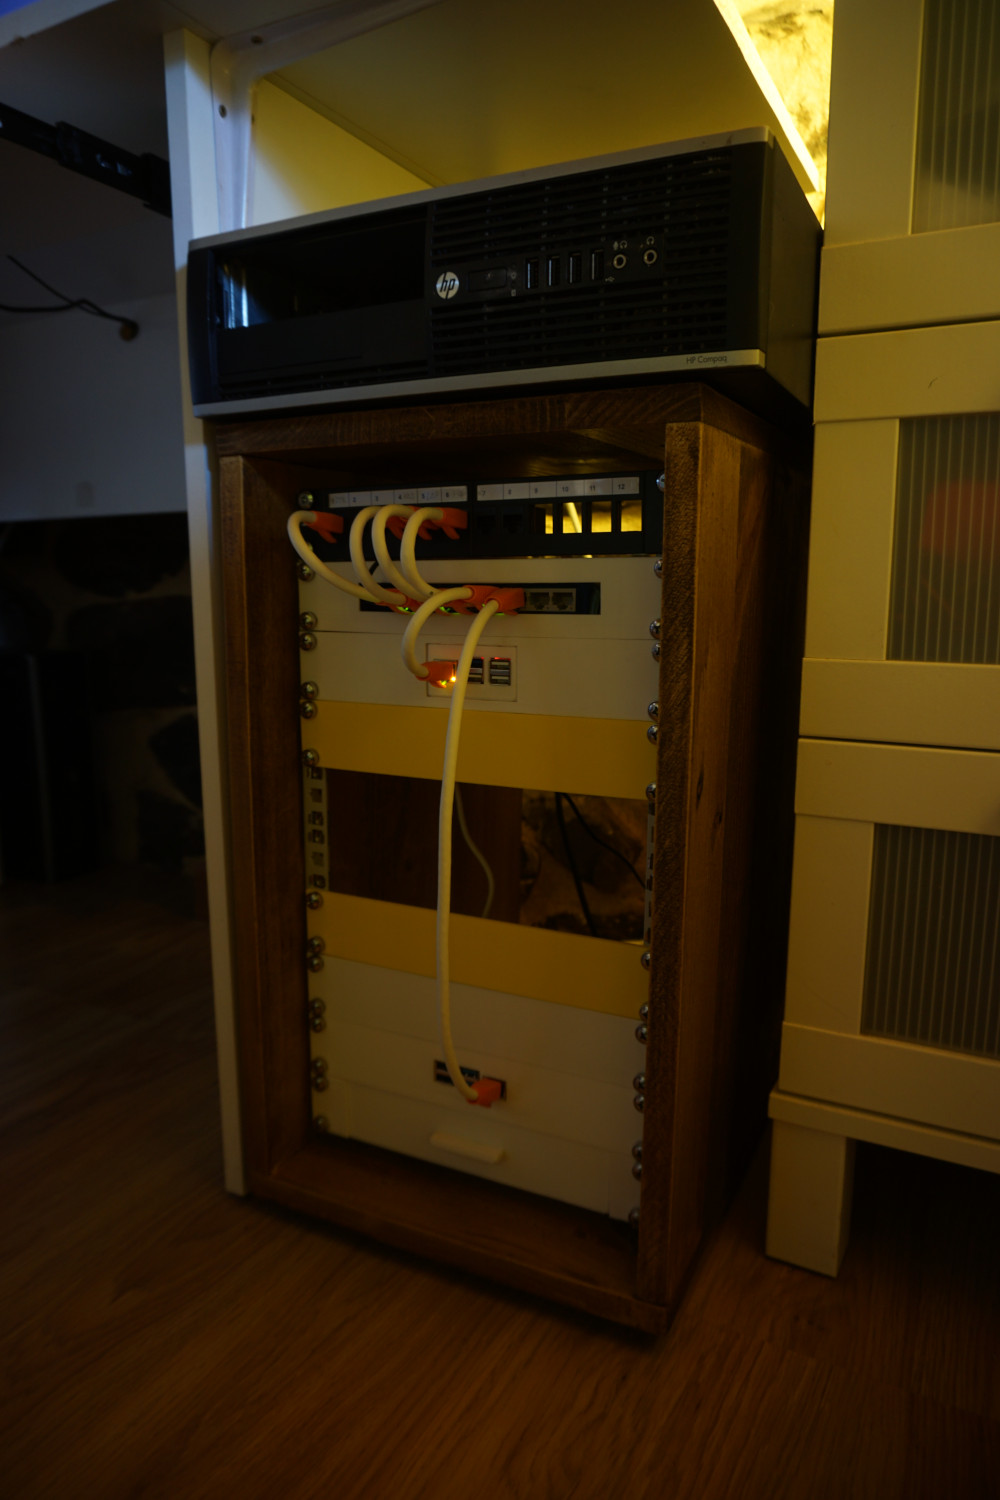
On retrospect, I could've put the switch on the middle of the rack to minimize the amount of cables that run over the rack appliances (On the current configuration, there are several cables running over the topmost SBC), on large networks this complicates getting things out of the rack, though, on such a small rack it is not much of a problem.
Homelabs are projects that keep evolving over time as new hardware gets included to add functionality and old hardware gets decommissioned. I will post all updates of my homelab here and keep the article updated with any future changes.