Minirack
December 2024A cost efficient, 10 inch wooden rack for mounting servers and other kinds of equipment.
Hardware
Handcrafts
Minirack
Introduction
Homelabbing is a hobby that has been gaining traction in the last several years and that I, somewhat recently, decided to pick up. I have always been fascinated by datacenters and servers in general, and so I wanted to build my own rack to mount my own servers and production environments.
A rack is a standardized closet or frame that is designed to mount equipment; in this case servers, computers and networking gear. It is usually made of metal and is designed for accessibility and ease of use. There are plenty of off-the-shelf options in different formats, but I decided to build my own one because of space and budget constraints.
Design
When designing the rack I had to take into consideration the space constraint first and foremost. I was determined to have the rack on my bedroom, which strongly conditions it's dimensions since space is very limited.
Building a standard, full 19" rack was out of reach because of the width, so I settled on a 10" design, which is far from the most common form factor but is recently starting to make an appearance, mainly in the homelab community. This obviously means that 19" device mounts and plates will not be compatible, but it is a trade I am willing to make since 10" are small enough to 3D print custom mounts on a regular printer.
Height-wise, I had two options, 8U or 10U. Rack spaces are measured in U units. An U unit is equivalent to 1.75 inches or 44.45mm and it is the smallest size a module can be, so this limits how many modules can be mounted on a rack. I decided to pick 10U because running out of space in a rack is really inconvenient and I liked the look of a taller rack. Depth was chosen sort of arbitrarily, I made it extra deep in case something like a non rackable UPS or a NAS had to be laid at the bottom of the rack in the future. I think the depth also adds to the aesthetic, making it look more serious.
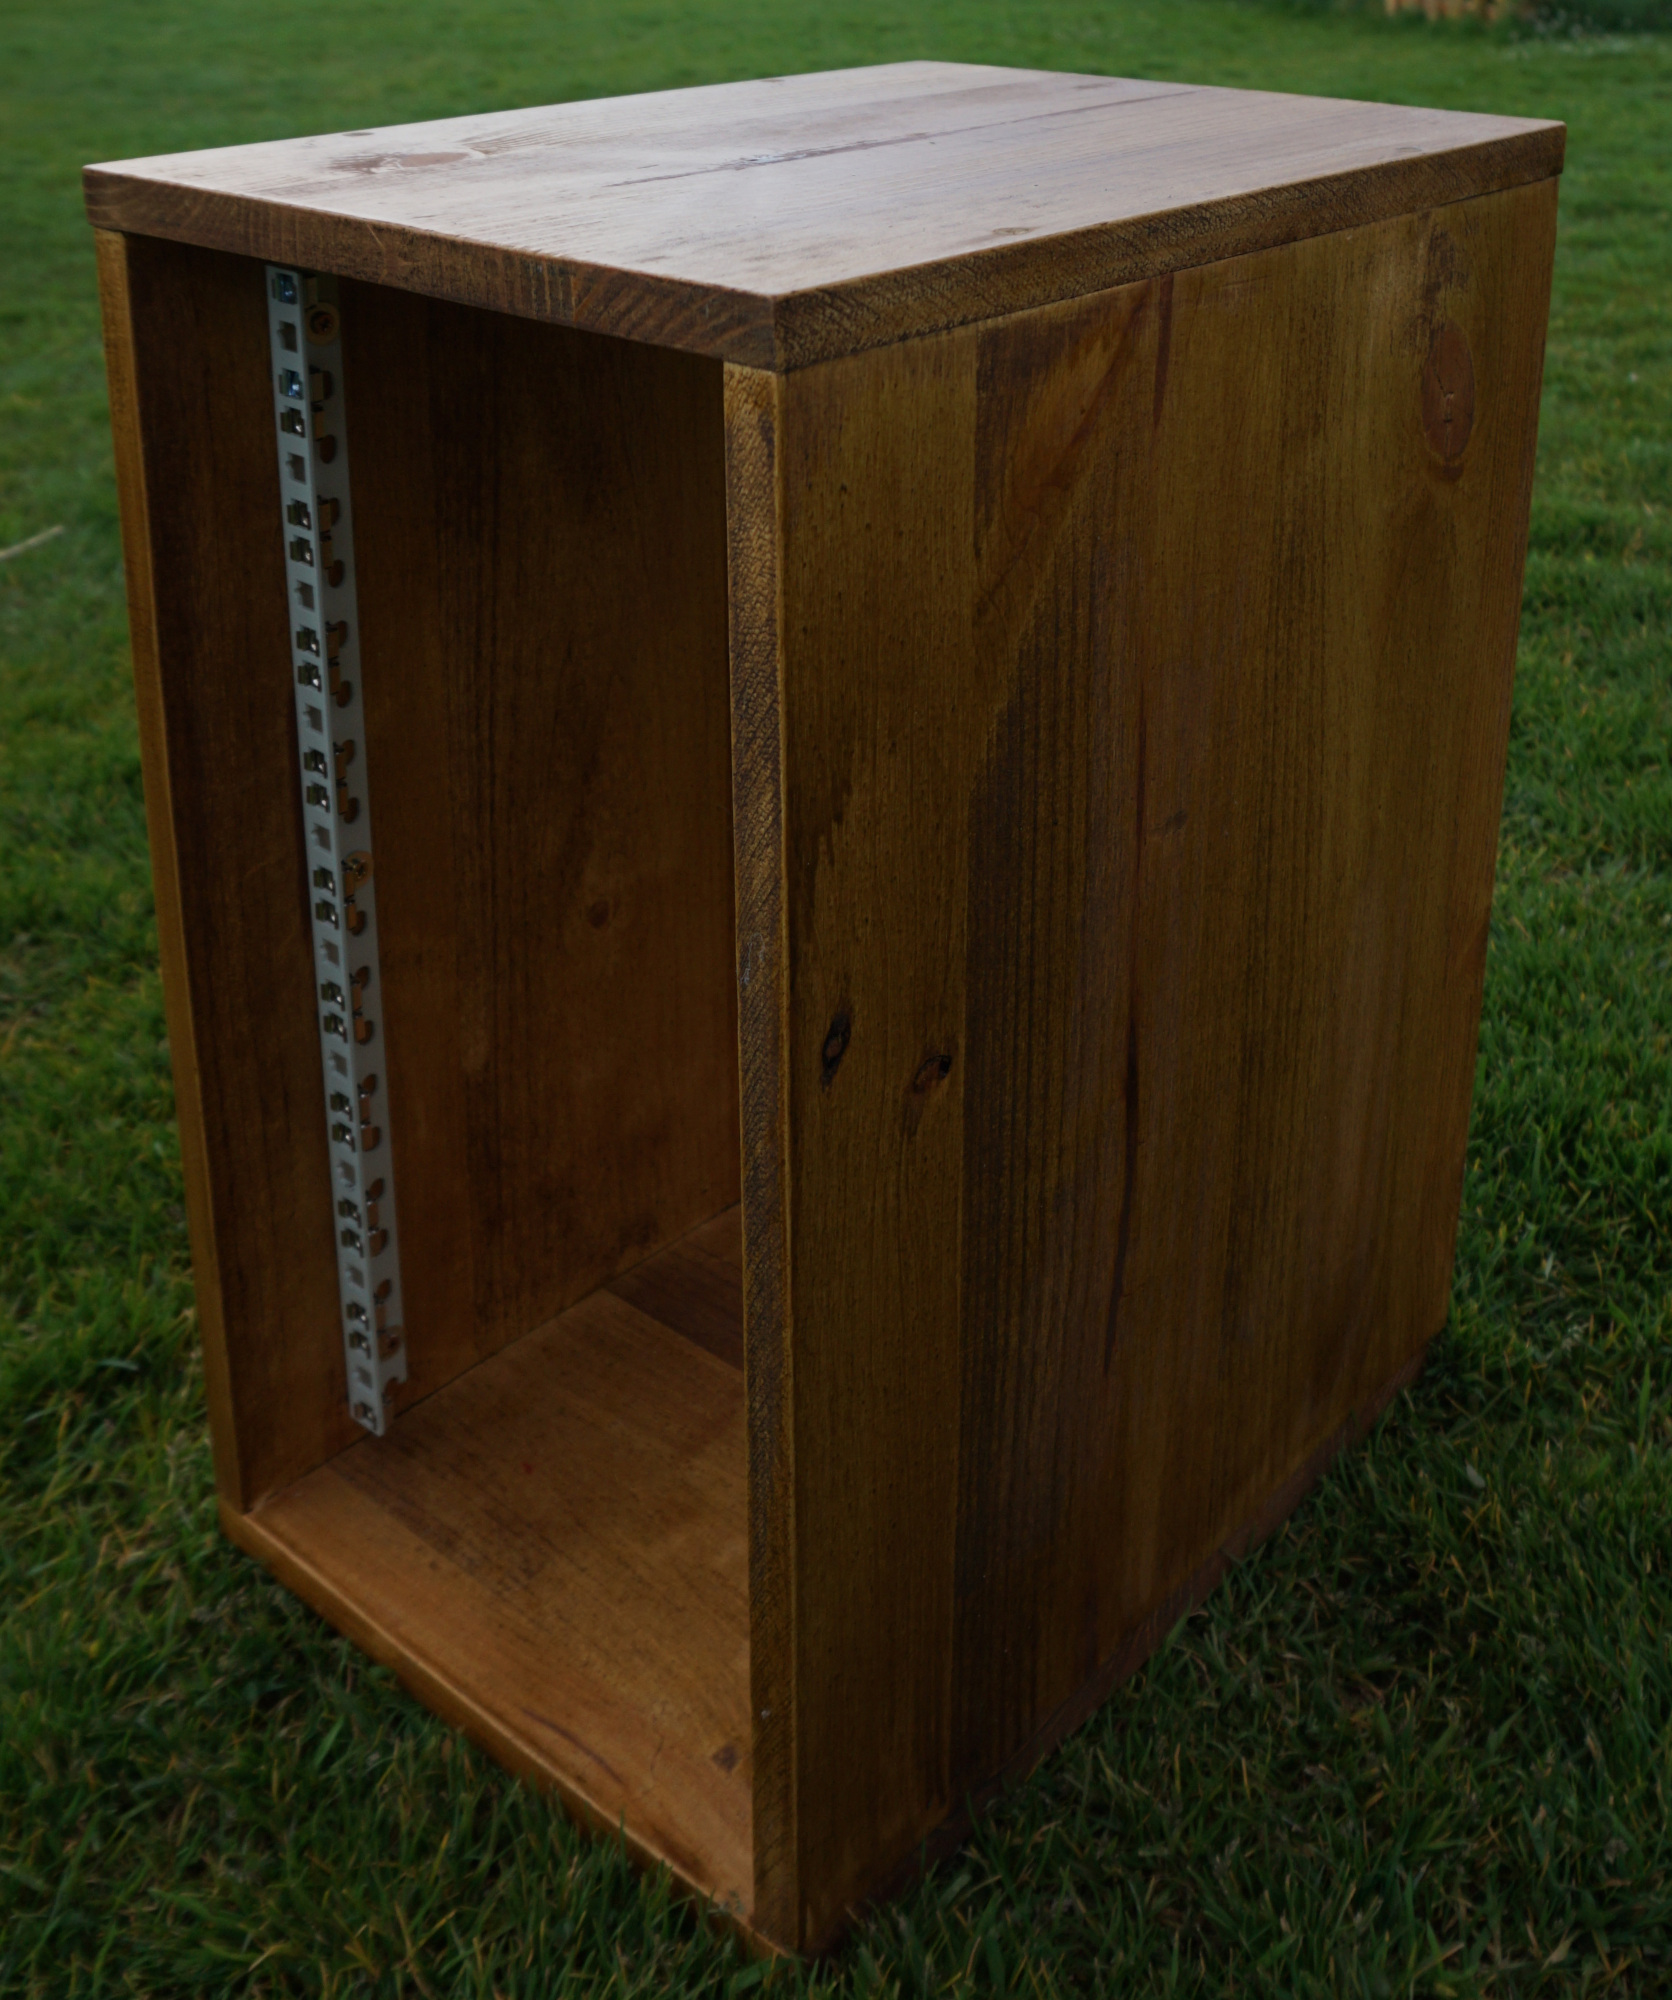
Despite having white melamine furniture in my bedroom, my door, ceiling and window frames are made out of dark brown / walnut varnished pine wood, so I wanted the rack to match that color scheme. Making the rack out of regular pine wood and varnishing it afterwards is not too expensive and spares some of the hassles of working with melamine. I really dig woodgrain, so I went all in on this idea. I also wanted to get white or clear grey rack rails because the plates would mostly be white.
The final dimensions of the rack look like this (All units in mm):
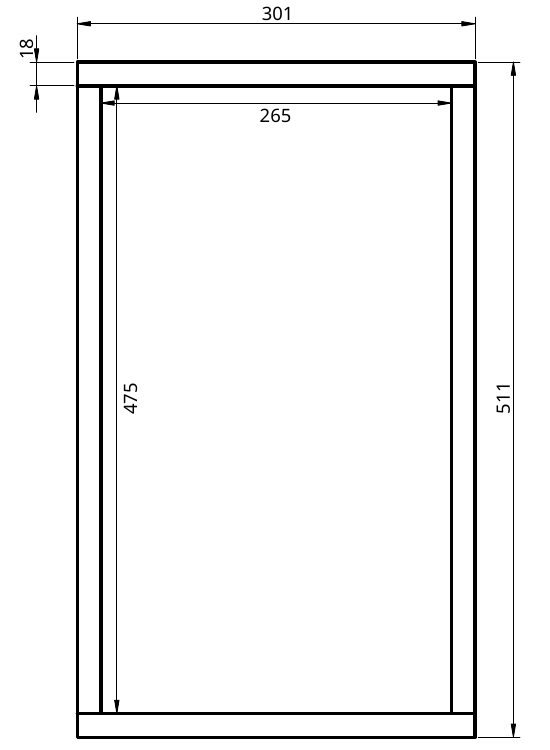
The interior is a bit wider than 254mm (10 inches) to allow for some play and account for the borders of the rack rails, and slightly taller too in case some cables need to be routed over or below the mounted components.
Bill of Materials
Al usual, the BoM only takes into consideration the materials and not the tools. If a component has to be bought in bulk, that bulk's price is noted:
| Item | Qty. | Price/Unit (EUR) | Total |
|---|---|---|---|
| Solid pine board (200x60x1,8 cm) | 1 | 24,00 | 24,00 |
| Wood screws (4x45 mm) (200 Units) | 1 | 5,49 | 5,49 |
| Water-based hole filler (375 ml) | 1 | 6,99 | 6,99 |
| Walnut varnish (750 ml) | 1 | 11,13 | 11,13 |
| 10U White rack rails (2 Units) | 1 | 14,98 | 14,98 |
| M6 cage nuts with screws (50 Units) | 1 | 13,99 | 13,99 |
| Total: | 76,58 |
As usual, you could possibly get some better deals at your local hardware store. If you are building something like this, I encourage you to investigate hardware stores in your area. The materials I have used are all of-the-shelf except, perhaps, the rack rails which are a bit more hard to come by.
Building
Before doing any varnishing or screwing or anything I had to cut the 4 sides of the rack.
When buying wood planks or boards, you might come across some places that offer cutting services as well. I did not find any that were open at the time, so I bought everything and decided to cut it myself at the workshop. In retrospect, this was a bad idea because I only have a couple of jig saws at home and no circular saws or sawing tables, therefore making the wood cutting process much more complicated and time consuming. If you have the chance to get the wood cut at a proper place, do so because getting quality cuts without proper tools is challenging.
Since I had no jig to get straight cuts I had to improvise one with old planks of straight wood and rulers to serve as guides and a few clamps to keep it all together.
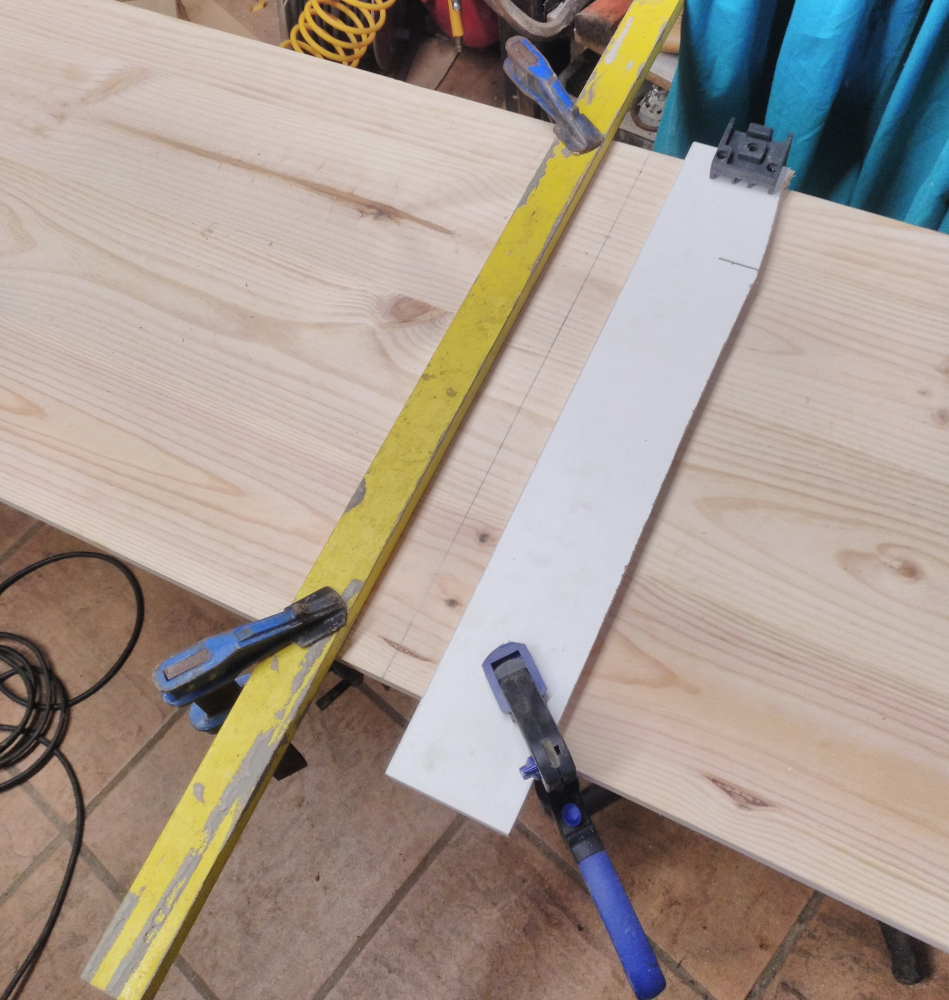
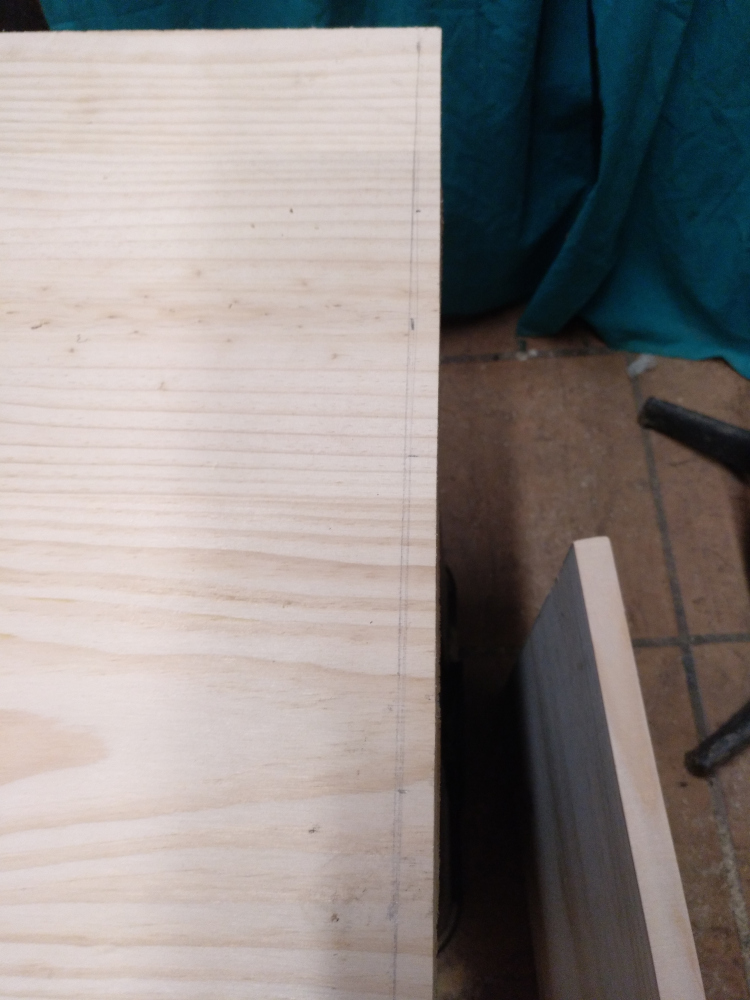
I measured everything and got to cutting all the pieces. Upon testing how all the pieces fitted, I noticed that one of them was not straight at all and did not fit properly. Luckily, there was quite a bit left of the 2 meter long board, so I had enough material to retry that cut and had all the pieces fit correctly.
To test if everything was right I mounted a 10" patch panel and blank plate in the rack rails and placed them inside of the rack to see if further adjustments had to be made.

Everything looked good and it was time to screw it all together. To prevent the screws' heads from popping out, I drilled a small, 2mm-ish deep hole where each screw would be placed; this way, the heads would be flush with the surface.
Once everything was together, I gave the wood a quick sand with some sandpaper, cleaned the wood dust with a brush and applied a layer of the water-based hole filler. This ensures that the wood does not absorb as much moisture as it normally would and usually makes the varnishing process quicker, as less coats are needed.
The weather was pretty cold so it took 2 days for the hole filler to set, but once that was done I gave the surface another quick sand, cleaned it and applied a coat of varnish to all the surfaces, propping it up with some spray paint caps to keep the entire bottom from resting on the table.
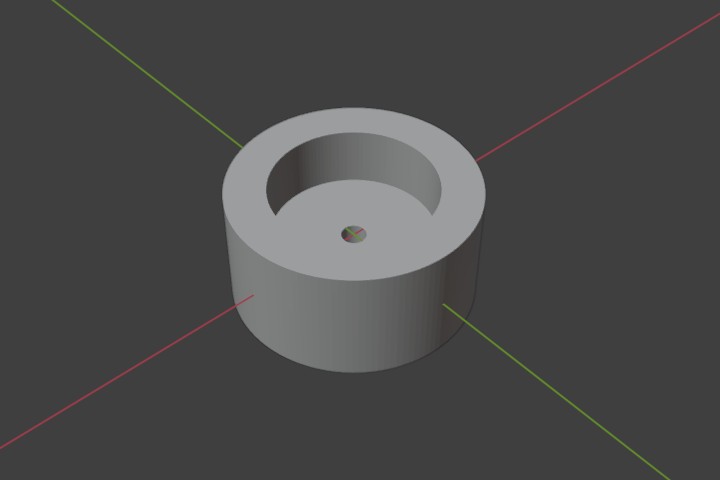
The varnish took 3 days to set and another few to stop producing fumes. Meanwhile, I designed some simple feet that would screw to the bottom of the rack and printed them in black PLA.
Finally, I screwed the rack feet and the rack rails making sure that both rails were aligned, attached the cage nuts to the rack rails and wrapped everything up.
Results
As of the writing of this, I have been using the rack to mount several things and it looks and functions just as I expected.
If I had to go change something about the build, perhaps giving it another sanding and using finer grit paper for the final pass would have been beneficial, as some surfaces are still a bit rough. Some rack plates fit a bit tightly, so a few less millimeters on the inside would be better, but it is nothing a little bit of wiggling can't solve.
I am happy with the result and I think it looks pretty sick. You can keep track of how it changes over time and how it looks with modules mounted on my homelab's article.
Links and files
The printable rack feet can be downloaded from the following links: